Developer Tools
Use Developer Tools to configure webhook integration, receive data from HIS, generate screen-embedding details, and access WhatsApp and integration documentation.
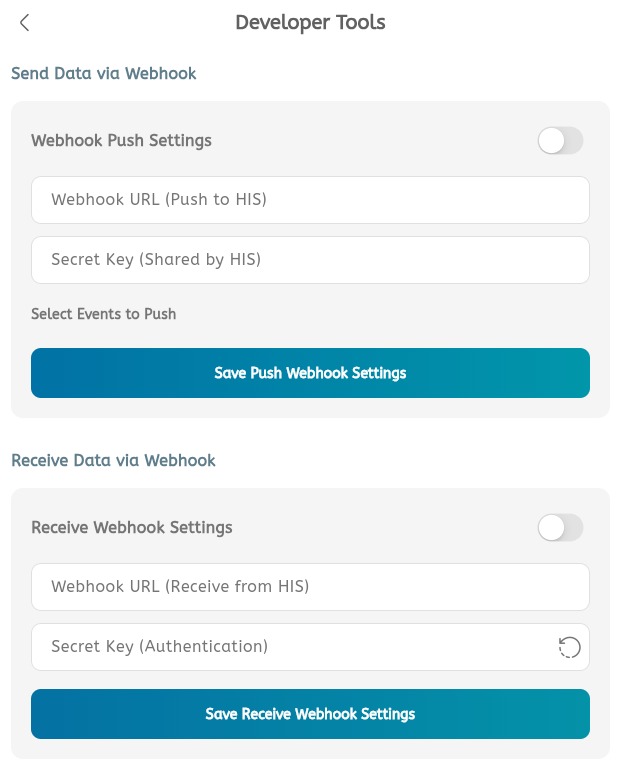
Send data via webhook
- Open the main menu.
- Expand System Tools.
- Tap Developer Tools.
- Under Send Data via Webhook, review Webhook Push Settings.
- Turn on the webhook push toggle when data should be sent to HIS.
- Enter the Webhook URL (Push to HIS).
- Enter the Secret Key (Shared by HIS).
- Select the events to push.
- Tap Save Push Webhook Settings.
Receive data via webhook
- Under Receive Data via Webhook, review Receive Webhook Settings.
- Turn on the receive webhook toggle when HIS should send data to Buktor.
- Enter the Webhook URL (Receive from HIS).
- Enter or generate the Secret Key (Authentication).
- Tap Save Receive Webhook Settings.
Screen embedding
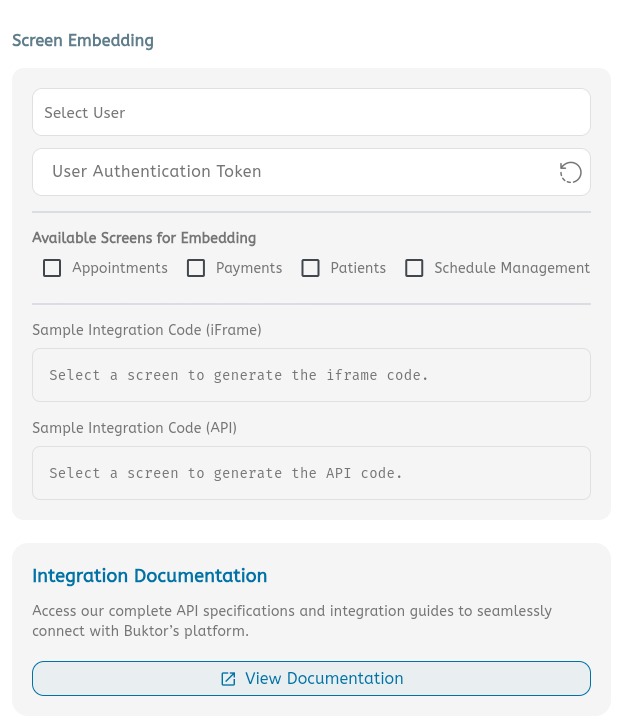
- Scroll to Screen Embedding.
- Select the user.
- Generate or review the User Authentication Token.
- Under Available Screens for Embedding, choose one or more screens:
- Appointments
- Payments
- Patients
- Schedule Management
- Review the Sample Integration Code (iFrame).
- Review the Sample Integration Code (API).
- Use View Documentation to open the complete integration documentation.
Integration documentation
Use this section when a clinic, hospital system, HIS, or partner application needs to connect with Buktor.
- Open Developer Tools.
- Scroll to Integration Documentation.
- Tap View Documentation.
- Review the integration overview.
- Use the embedding guides for appointment booking widgets and Buktor Pro screen embedding.
- Use the webhook guides for sending Buktor events to HIS and receiving HIS events in Buktor.
- Use the on-demand API guide when HIS needs to request data from Buktor directly.
- Use the middleware connector guide when the HIS requires middleware-based syncing.
Related integration pages:
- Integration Overview
- Embedding Appointment Booking Widget
- Embedding Buktor Pro App
- Buktor Webhook: Event Notifications to HIS
- HIS Webhook: Event Notifications to Buktor
- On-Demand API Calls
- HIS Middleware Connector
WhatsApp section
Use this section for WhatsApp Business setup, migration, and API-related work.
- Open Developer Tools from System Tools.
- Use WhatsApp setup pages when connecting a WhatsApp Business Account.
- Use Meta Business Verification when business verification is required.
- Use WhatsApp Backup Migration when moving an existing WhatsApp setup.
- Use WhatsApp API documentation for supported WhatsApp integration endpoints.
- Confirm the WhatsApp number and template setup before enabling patient notifications.
Related WhatsApp pages:
